Once upon a time, learning about the structure of overlays and enhancements was at the centre of beginner education. Nowadays, it doesn’t seem to feature as much and hardly ever for UV gel polish users. Plus, there are so many different shapes of enhancements that many favour it is often down to the appearance of the shape rather than understanding the strongest structure.
É hora de fazer uma pequena revisão.
An arch is very strong structure as any weight or forces put on it are mostly evenly spread all across it. The natural nail has two arches:
- From the base to the free edge: the upper arch
- From the one side wall to the other: the ‘C’ curve
Obviamente, as pessoas têm configurações diferentes desses arcos. Acho que todos concordam que as unhas naturais mais bonitas são finas e com curvas suaves. Elas também costumam ser as mais fortes. As unhas com formato mais plano têm mais tendência a quebrar.
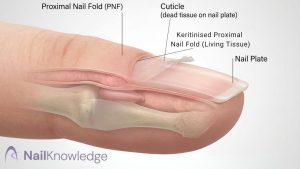
The highest point of both these arches is usually in the centre of the nail and just behind the hyponychium. This is called the apex or stress area and is what gives the nail the best strength to withstand bending and breaking.
When creating a natural looking enhancement this is where the most product needs to be to provide the strongest structure. Careful shaping will disguise the thicker area as the overlay will be thinned down at the base and free edge and along the side walls, thus creating a gentle ‘upper arch’ and strong ‘C’ curve.

Entretanto, para formatos de unha mais longos e extremos, o ápice forte precisa estar mais para trás em direção à base. Isso funciona como um tipo de âncora que suportará as pressões exercidas sobre a borda livre longa. Mas, mesmo com o ápice ligeiramente deslocado, o ápice natural da unha (conforme descrito acima) ainda precisa de alguma ajuda para evitar que a unha se quebre.
With a carefully constructed enhancement this is achieved by creating a ‘back bone’ down the length of the nail. Again, this is disguised by accurate shaping. Some extreme shapes need a straighter ‘upper arch’ if any arch at all! But the strength still needs to be there. This is why an understanding of the arches, the apex, and accurate product placement is important for the different shapes.
There has been a popular shape that is a short ‘stiletto’ where the free edge is a point. For this design, the apex is usually placed close to the base of the nail. It doesn’t need to be there to support the length but, if it was placed over the ‘stress area’ it would create an ‘upper arch’ that, together with the point, would look more like a claw! This shape does, however, grow out quickly and leaves thick apex in an unattractive place.
On a more natural looking enhancement, the growth of the natural nail will have the apex over the free edge and unbalance the structure which can result in breakages. This is where the term ‘rebalance’ comes from when maintaining the enhancements. The original apex needs thinning down and replaced back to where it should be to balance the nail again.
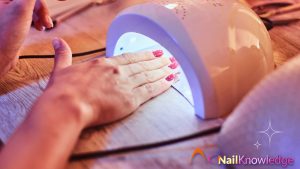
‘Builder’ type UV gels that have become very popular in many UV gel polish systems are used to strengthen the nail by ‘building’ a stronger structure. But structuring the overlay is not often taught to those just using a UV gel polish. It should be noted here that the new National Occupational Standard for UV gel polish now includes ‘builder’ products and their correct application and structuring.
Para concluir, uma pequena revisão sobre a estruturação de uma sobreposição ou aprimoramento para aqueles que se qualificaram nesse serviço e talvez algumas novas informações para aqueles que se qualificaram apenas em polimento com gel UV.