Someone else applied the nail system
Many seem to struggle with removals of UV and L&P overlays or enhancements. Especially if they have been applied by someone else.
There is really no reason to refuse to remove someones else’s work, not if you understand the science behind it. There is a good chance you could gain a new and loyal client.
The majority of nail systems can be soaked off
There are many different systems being used today but it is only a ‘hard gel’ that will not soak off and needs to be buffed off for removal. All other systems, including UV gel, L&P, dip systems (unless those with a hard UV gel), fibreglass, full cover tips etc. can be soaked off using acetone based products.
So what’s on your nails?
As a rough guide:
UV gel based systems will soak off in 10-20 minutes. If there is no change in the coatings after this time then it could be a hard gel version that needs buffing to remove. Clients do not always know what is on their nails.
L&P will soak off in around 30 minutes. If it is one with an MMA monomer, then this will take several hours and will need buffing off (a very long job in itself)
Many UV gel polish systems use a hard gel top coat to help protect the colour from damage. The client may know this but unless you know for sure, it is often worth lightly buffing the surface to break it up and allow for the solvent to penetrate.
Removal methods
- Acetone soak
prepare a solvent resistant bowl with just enough acetone to cover nails (no deeper). After buffing the surface, ask the client to place their nails in the solvent and leave in there for at least 10 mins to start with,
Make sure the coating is starting to lift at this time. If not it may be a hard gel and will not soak off
Speed up the process
Have 2 bowls one big enough for 10 fingers to fit in and one larger.
Place acetone in the small bowl, as above, and warm water in the larger one. Place the small one in the larger one and ask your client to place their fingers in the solvent.
Cover the whole thing with a towel to prevent vapours from escaping.
Precaution
Make sure the bowls are on a flat table and not in any danger of being tipped over.
Don’t use boiling water as this could make the solvent too hot and avoid burns if accidentally tipped over.
2. Wrap removal
This is a similar method to the above but doesn’t use an open bowl. Instead, it uses tin foil to secure a cotton pad tightly on the nail that has been soaked in acetone.
Pre-cut foil can be purchased but kitchen foil cut into appropriate sizes will also work.
Soak the cotton pad (half or half the thickness will work) in acetone, place it on the nail and tightly wrap it in the foil. Fold the end over. make sure it fits tightly to make sure the solvent cannot escape and the pad is held against the nail.
After around 10 mins, unwrap to see how the removal is progressing. It is likely to need some more solvent added to the pad and, as above if the coating isn’t moving, it may be a non-soak-off coating. Re-wrap until coatings are all removed.
Speed up the process
lacing the hands in heated mitts will speed up the process enormously (but make sure the lining is protected from the acetone with liner or glove over the whole hand.
A heated pad will also work, especially in the winter when clients hands will be cold.
Precaution
If you are using any electrical equipment, make sure it is safe by PAT testing (see this Blog)
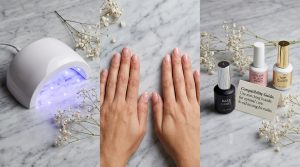
3. Heated removers
Relatively new for the sector are electric heaters designed for removal. (Doug Schoon has reviewed them and deemed them safe to use if used responsibly)
These have a bowl for the solvent that sits in a heated unit.
It is covered with a lid that has finger holes that have a seal to prevent vapours from escaping.
This method means that the fingers do not have to touch the solvent and the vapours under the lid will soak off the coatings.
NB, vapours are actually the chemical. Much like steam from boiling water is still water.
Speed up the process
Have 2 units so both hands can be soaking at the same time.
Precaution
Test the unit yourself first. Some can get quite hot, sometimes too hot so fingers only need to go through the cover a very short way.
Make sure the unit is stable and cannot tip over or pulled off the desk.
The science bit
Every material has a certain amount of permeable characteristic (allows for penetration of molecules) even metal!!
The structure of the molecules of every material will have gaps of varying sizes between them. Depending on the size and shape of the spaces and the shape and size of another material (e.g solvents, water, oil etc.)
Soak-off coatings have a molecular structure that allows for small molecules, such as suitable nail oils and acetone to penetrate and break the polymer bonds that formed during curing.
Hard gels have a much tighter structure that does not allow easy penetration of a solvent (acetone has the smallest molecule which is why it is the best remover)
Hybrid gels are pure gels plus solvents. The solvents evaporate from the coating and as they do this they create a ‘tunnel’ where the solvent works it way up to the surface. This allows for very easy acetone penetration and is the fastest to remove.
Cyanoacrylates have a linear molecular structure allowing for easy penetration.
Dip systems with either a UV gel or a cyan acrylate can be harder to remove as the powder fills up a lot of the spaces in the polymer structure so making penetration difficult
The least amount of spaces does make for a stronger structure which is why many prefer hard gels for sculpting and enhancements. Hybrids and ‘soak offs’ are not as strong but this has a good compromise as being much faster to remove and less skin and nail exposure to drying solvents.
L&P can be penetrated due to the polymerised structure even if it has advanced cross-links. This is why the daily application of nail oil is important as it fills up the spaces and keeps it flexible.
Every type of product has a reason for use depending on what the client needs and the condition of their nails.
General precautions
If your clients skin is dry or they don’t like the whiteness after contact with acetone, then oil can be applied for some protection. This can easily wash off so a balm or a product like Vaseline can be painted on to give more protection, but only on the skin and not the nail!
When the nails have been removed from the solvent, NEVER scrape off any remaining coating as the nail plate will be soft and very easily damaged. To remove any remaining product, just soak a cotton pad in acetone and rub the product off.
Acetone is a volatile solvent and evaporated easily, releasing the chemical into the air. Make sure you dispose of all remaining solvent, foils etc. safely and responsibly!
Soak up the remaining liquid with a paper towel and place it into a covered and lined bin. OR place in a safe outside area (where no children nor animals can access it) and allow it to evaporate.
Never pour down the sink or lavatory as many pipes are plastic and vapours can build up in sewers!
There is no need for removal to be a difficult or stressful procedure. Your timings just need consideration.
If you provide free removal if you applied the coatings then allow for the time in your fee. Removing others work must be charged accordingly. If you do phone bookings there is a lot that can be ascertained at this time (not so easy for online bookings)