• Skip to primary navigation
  • Skip to main content
  • Skip to footer
NailKnowledge

NailKnowledge

  • Courses
  • MyNailEra
  • Free eBooks
  • Knowledge Base
    • Knowledge Base
    • Ask the Experts
    • Glossary
  • News
  • Blog
  • Login

Lotions, Potions and Polishes

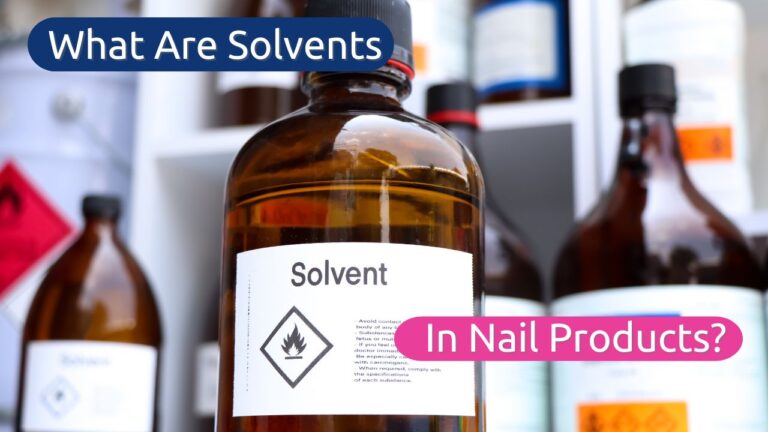
What Are Solvents in Nail Products?

Understanding the Chemistry Behind your Manicure

Ever looked at your favourite nail polish and wondered what makes it glide so smoothly onto your nails and then dry to a hard, glossy finish? It’s not magic, it’s science. And at the heart of that science are solvents. Now, what are solvents in nail products, exactly? Not something you chat about over brunch, I get it, but once you understand their role, you’ll never look at a manicure the same way again.

The Unsung Heroes of Nail Polish: Solvents Explained

Solvents are the invisible workhorses of the nail world. They’re the liquid components in your polish that do the heavy lifting, dissolving pigments, resins, plasticisers, and additives so that everything blends into one smooth, usable formula. Once you apply that polish, the solvents quickly evaporate into thin air, leaving behind a beautiful, solid film of colour.

To put it plainly, if nail polish were a cocktail, solvents would be the gin, essential, potent, and responsible for making everything else mix just right.

Without solvents, the polish wouldn’t flow out of the bottle, it wouldn’t spread evenly on your nail, and it certainly wouldn’t dry properly. The role of solvents in nails is both practical and aesthetic, affecting everything from drying time to texture, shine, and longevity.

☕ A Cup of Tea and Nail Polish?

Think of a solvent like the hot water in a cup of tea. You drop the tea bag in, and the water draws out all that flavour and colour, blending it into a smooth, aromatic brew. Then you drink it, and the liquid disappears, leaving you with the flavour and the caffeine buzz.

It’s the same with nail polish solvents, they’re the liquid that carries all the good stuff to your nail. Once the polish is applied, the solvent evaporates, and what’s left behind is a thin, colourful, glossy film ready to dazzle.

Why Solvents Matter: it’s More than Just Drying the Polish

When we ask, what are solvents in nail products, we’re really opening the door to a deeper appreciation of how nail coatings actually work. Here are just a few of the things solvents do:

  • Dissolve and disperse colour pigments and resins, creating a uniform formula.
  • Control viscosity, so you get that perfect thin layer that doesn’t streak or bubble.
  • Help coatings self-level, making the surface smooth and professional-looking.
  • Evaporate efficiently, allowing a hard, durable film to form.
  • Influence drying time and adhesion, crucial for wear and finish.

In essence, they’re like backstage crew in a theatre. You may not see them, but without them, the show couldn’t go on.

What Are Solvents in Nail Products Doing in Different Nail Systems?

Solvents aren’t one-size-fits-all. Their role shifts depending on whether you’re working with traditional lacquer, gel polish, or hybrid formulas. Let’s break it down.

  • Traditional Nail Lacquer
    This is where solvents shine. Lacquer dries entirely through solvent evaporation. It’s why you can often smell it, solvents like ethyl acetate and butyl acetate are doing their job, vanishing into the air so the pigment can stay behind.
  • Gel Polish
    Gels use far fewer solvents. They rely on UV or LED light to cure and harden. But a small amount of solvent is still involved in the base or top coat to help spread the product smoothly.
  • Hybrid Polish Systems
    Think of these as the best of both worlds. They combine nail polish solvents with light-curing elements. This gives them the ease of application of traditional polish and the staying power of gel, while still depending on some evaporation.

Common Examples of Solvents in Nail Care

Here are the usual suspects you’ll find listed on the back of your nail product packaging:

  • Ethyl Acetate – The primary solvent in many polishes. Evaporates quickly and has that sweet, nail-salon smell.
  • Butyl Acetate – A bit slower to evaporate than ethyl acetate, helping with smooth application.
  • Isopropyl Alcohol – Found in prep products and sometimes in polish to help thin it.
  • Acetone – Often used in removers, but also plays a role in some polish formulas.

These examples of solvents in nail care vary in strength, speed of evaporation, and scent, but all serve to deliver, spread, and remove the product efficiently.

Safety first: using solvents wisely

It’s easy to forget that nail solvents, though effective, are still chemicals. Used properly, they’re safe, but it’s good to have a few best practices in mind:

  • Work in a well-ventilated space. Inhaling solvent fumes over time isn’t great for your lungs.
  • Apply thin layers. This helps solvents evaporate evenly and prevents bubbles or streaks.
  • Avoid open flames. Some solvents are flammable (think acetone or ethyl acetate).

Also, keep an eye on product labels if you have sensitive skin or allergies. There are now more “low-odour” and “non-toxic” nail products hitting the market, which swap out harsher solvents for gentler alternatives.

Wrapping it up: a Little Chemistry Goes a Long Way

So next time you’re applying a fresh coat of polish, remember the invisible but powerful chemistry at play. Asking what are solvents in nail products is like asking how the stage gets set before a theatre performance, it’s the part that makes everything else possible. From the perfect flow to that satisfying dry-down, solvents are the reason your nails look salon-worthy in minutes.

Understanding them doesn’t just make you smarter, it might even make you better at applying polish. And hey, who doesn’t want fewer bubbles, faster drying, and a finish that lasts?

Filed Under: Lotions, Potions and Polishes

What Is Nail Base Coats and Why Do They Matter?

f you’ve ever wondered what is nail base coats, you’re not alone. Clients often see base coats as “just another clear polish,” while some nail techs may treat them as optional. The truth is that base coats are one of the most important parts of every nail service. They don’t just make nails look good, they protect the natural nail, improve product adhesion, and extend wear.

This blog breaks down what nail base coats are, the different kinds available, how to use them correctly, and common mistakes to avoid.

Understanding the Role of a Nail Base Coat

Think of a base coat as the foundation of your nail service. While invisible to the client, it has a big impact on results.

  • Adhesion – Base coats help products grip the nail plate, preventing lifting or peeling.
  • Protection – They create a barrier that stops strong pigments from staining the nail.
  • Durability – Services last longer and resist daily wear when a base coat is applied.
  • Smoothness – Small ridges or imperfections get filled in, creating a flawless canvas.

Without this step, polish and gels don’t perform at their best.

Why This First Layer Matters in Nail Services

Clients may not understand why a clear coat makes such a difference. As professionals, it’s our job to explain. A good base coat means fewer chips, no staining from dark reds or blues, and a manicure or pedicure that feels smooth and lasts longer.

Skipping it may save a couple of minutes, but it almost always leads to client complaints. In short, base coats don’t just benefit the nail — they benefit your reputation.

Different Kinds of Base Coats for Nails

There isn’t just one type of base coat. Formulas vary depending on the system and purpose.

  • Traditional polish base coats – These clear polishes prevent staining and help lacquer stick.
  • UV/LED gel base coats – Specially made to bond gels to the nail plate, and must be cured in the correct lamp.
  • Rubber or flexible base coats – Slightly thicker, they smooth uneven nails and give weak nails extra support.
  • Specialty base coats – Some brands add fibers, proteins, or vitamins. These sound appealing but remember: nutrients don’t penetrate the nail plate. The real benefit comes from the coating itself.

Mistakes Professionals Should Avoid

Even experienced nail techs sometimes slip up with base coats. Here are the most common mistakes and how to prevent them:

  • Skipping the base coat – This leads to staining and shorter wear.
  • Using the wrong formula – A gel base won’t work with polish, and polish bases can’t bond gel.
  • Applying too thickly – Thick layers don’t cure evenly and can peel.
  • Believing marketing hype – Proteins or vitamins in base coats don’t “feed” the nail.
  • Storing poorly – Leaving bottles open makes them thick and unusable.

Paying attention to these details makes a big difference to results.

How to Explain Base Coats to Clients

Clients often ask, “Can’t we just skip this step?” That’s your chance to show your expertise.

Try simple explanations, such as:

  • “This clear layer stops your natural nails from turning yellow.”
  • “It helps the color grip so your polish lasts longer.”
  • “It keeps the surface smooth so the finish looks professional.”

When clients hear the science in everyday language, they understand why nail base coats aren’t optional.

Key Takeaway: Building Long-Lasting Results

So, what is nail base coats? They are the invisible foundation that makes every service stronger, safer, and longer lasting. By choosing the right type, applying it correctly, and curing it with the correct lamp, you’ll prevent staining, improve adhesion, and keep clients coming back for results they can see.

Want the deeper dive into this subject? 👉 Read our full Knowledge Base article on Nail Base Coats.

Quick FAQs

Can I use a base coat as a top coat?
No. Base coats are designed for adhesion, not protection. You need a top coat to seal and add durability.

Do base coats really strengthen nails?
Not directly. They don’t penetrate the nail plate. The strength comes from the coating, which protects the nail from daily wear.

Do I need a base coat with gel polish?
Yes. Gel systems require a compatible gel base coat and proper curing. Skipping it will lead to lifting.

Filed Under: Lotions, Potions and Polishes

Understanding Oligomers in Nail Products

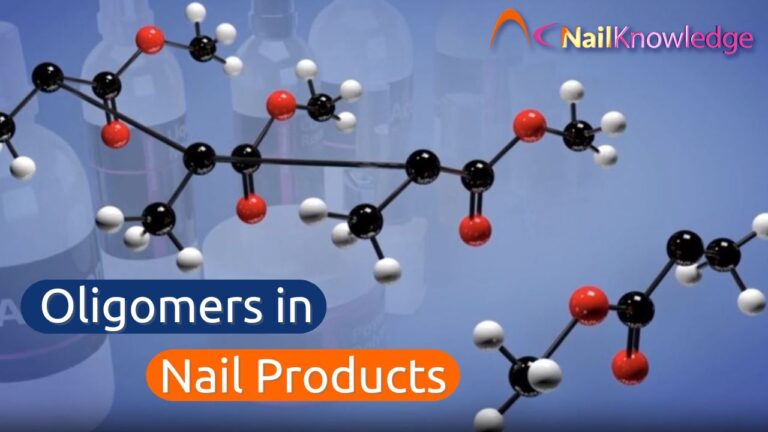
Why Oligomers Matter in Modern Nail Chemistry

Oligomers in nail products are a core ingredient in modern gel systems and other UV-cured coatings. These specialised chemical compounds are responsible for many of the qualities nail professionals and clients value, from a smooth application to long-lasting wear. Yet, despite their importance, they are often misunderstood or overlooked in conversations about nail chemistry.

For anyone working with gel polish, builder gels, or other light-cured systems, having a basic knowledge of oligomers can improve product choice, application techniques, and client safety. This knowledge can also help professionals cut through marketing claims and focus on what truly impacts performance.

What Are Oligomers in Nail Products

Oligomers are short chains of molecules that are partly built but not yet fully formed polymers. In other words, they are intermediate structures between liquid monomers and solid polymers. This makes them reactive and ready to link together when exposed to the correct conditions, such as UV or LED light.

In the context of nail chemistry, oligomers are selected for their ability to control how a product behaves before and after curing. They are not just passive ingredients. They directly affect:

  • Viscosity: how thick or thin the gel feels
  • Application control: how easily the product moves and levels on the nail
  • Curing quality: how completely the product hardens
  • Performance: how strong, flexible, and durable the coating becomes

Functional Role of Oligomers in Gel Coatings and Nail Enhancements

Oligomers in nail products influence almost every stage of the nail service. From the moment the gel is applied to the final cured result, their properties shape the outcome.

Key contributions include:

  • Controlling flow: High-viscosity oligomers create thicker builder gels that stay in place, while low-viscosity oligomers produce self-levelling products ideal for smooth overlays.
  • Reducing shrinkage: Oligomers minimise the pull-away effect that can lead to lifting.
  • Enhancing adhesion: They help form a stronger bond between the coating and the natural nail.
  • Determining flexibility: The type of oligomer used can make the cured gel more rigid or more flexible, depending on the desired finish.
  • Improving wear: By influencing scratch resistance and gloss retention, they help nails look fresh for longer.

Different Types of Oligomers in Nail Chemistry

Not all oligomers are the same. Manufacturers choose specific types or blends to create unique performance profiles.

Common categories include:

  • Urethane acrylates: Known for flexibility and toughness. They help coatings withstand daily wear without cracking.
  • Epoxy acrylates: Provide excellent gloss and high chemical resistance, making them ideal for top coats.
  • Polyester acrylates: Enhance adhesion and durability while balancing flexibility.
  • Custom blends: Many products use a mix of different oligomers to balance application, curing, and wear properties.

Each type of oligomer has a distinct molecular structure that influences the final feel and performance of the cured coating. Product chemists often experiment with these ratios to deliver gels with unique benefits.

How Oligomers React During the UV or LED Curing Process

The curing process transforms the applied gel into a solid, crosslinked coating. Here is what happens:

  1. Application: The gel, containing oligomers, monomers, and a photoinitiator, is applied to the nail.
  2. Activation: When exposed to UV or LED light, the photoinitiator absorbs energy and produces reactive species.
  3. Linking: These reactive species cause the oligomers and monomers to link together in a process called polymerisation.
  4. Solid network: The short chains of the oligomers join to form a long, crosslinked polymer network.
  5. Final result: The product becomes hard, durable, and ready for daily wear.

Without oligomers, this reaction would be less controlled, leading to coatings that are brittle, weak, or prone to defects.

Safety Considerations with Oligomers in Nail Products

Oligomers are safe when fully cured, but uncured material can cause skin sensitivity or allergic reactions in some individuals. Nail professionals can reduce the risks by:

  • Following the manufacturer’s recommended curing times and lamp specifications
  • Avoiding skin contact with uncured product
  • Wiping away any spills immediately using an appropriate cleanser
  • Maintaining clean tools and work surfaces
  • Educating clients not to pick or peel coatings, as this can expose uncured layers

Proper curing is especially important. If the light output, wavelength, or exposure time is incorrect, some oligomers may remain unreacted. This not only affects safety but also reduces the durability of the service.

Why Understanding Oligomers Matters for Nail Professionals

A strong grasp of oligomers in nail products can improve both technical skills and client trust. It enables professionals to:

  • Select products based on real performance needs rather than marketing hype
  • Troubleshoot issues such as lifting, peeling, or poor gloss retention
  • Explain the science behind services to curious clients
  • Stay informed about ingredient safety and regulatory updates
  • Build a reputation for delivering consistent, high-quality results

Educated nail professionals can also better assess new products. By reading ingredient lists and recognising oligomer types, they can predict how a gel is likely to perform before even opening the bottle.

Key Takeaways on Oligomers

Oligomers are the backbone of many modern nail coatings. They control viscosity, improve adhesion, reduce shrinkage, and determine the flexibility and durability of the cured result. Understanding them is not just for chemists. It is essential for any nail professional who wants to deliver safe, beautiful, and long-lasting nails.

By applying this knowledge, professionals can work more effectively, avoid common issues, and build a stronger connection with clients through transparent, science-based service.

Filed Under: Lotions, Potions and Polishes

Mixing Nail Products for Nail Art vs Enhancements

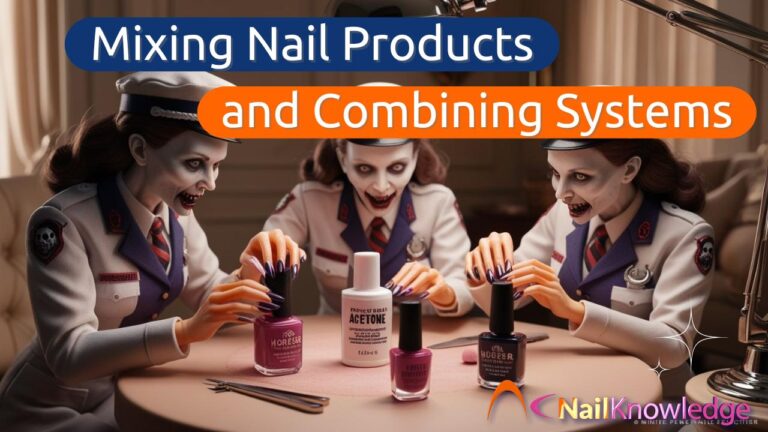
Safe and Unsafe Ways of Mixing Nail Products and Combining Systems

In the quest for unique designs, nail professionals often experiment with mixing nail products to achieve a custom look. This might involve adding glitters, pigments, or foils for nail art, or combining products from different systems to create enhancements. The problem is that these two approaches are not equally safe. One can be acceptable if done within professional guidelines, while the other can damage nails, increase allergy risk, and jeopardise your reputation.

Mixing Nail Products for Structure vs Nail Art

Mixing nail products for structural enhancements, such as combining different brands of base, builder, or top coats, disrupts the chemistry of a tested system. This increases the likelihood of lifting, cracking, under-curing, and allergic reactions.

Mixing for nail art, such as applying pigments or glitters, can be safe when the decorative elements are applied to a fully cured coating and cosmetic-grade materials are used. However, even decorative mixing must be done with care to avoid curing and safety issues.

Pigments, Glitters, and the “Umbrella Effect”

UV/LED nail products cure through a precise chemical reaction that requires specific light wavelengths, intensity, and time. Dark pigments like black, navy, or deep red, as well as reflective glitters, can block or scatter UV light. This is often called the “umbrella effect”.

When light cannot penetrate deep into the layer, the product may remain under-cured beneath the surface. This hidden problem increases the risk of skin contact with uncured monomers, which can lead to allergic contact dermatitis. Larger glitter particles and metallic flakes can also reflect UV light away from the coating, reducing cure depth.

To minimise risk:

  • Keep decorative layers thin
  • Cure for at least the manufacturer’s recommended time — sometimes longer for dark or glitter-heavy colours
  • Always use the correct lamp for the product system

Choosing Cosmetic-Grade Materials When Mixing Nail Products

Non-cosmetic pigments and glitters, such as those intended for crafts, are not safety tested for skin contact. They may contain allergens like nickel or cobalt, which can trigger allergic reactions even in small amounts.

Checklist for safe additives:

  • Only use cosmetic-grade materials with CI numbers
  • Purchase from reputable suppliers
  • Request a Safety Data Sheet (SDS) or Certificate of Analysis

Using unverified materials risks your clients’ health and may void insurance coverage (read more on glitter safety).

When Mixing Nail Products for Art Becomes Unsafe

Even when the intent is decoration, mixing nail products can become unsafe if:

  1. Excessive pigment or glitter is stirred directly into uncured gel base or top coats
  2. Additives exceed 30% of the product volume, changing curing performance
  3. Non-cosmetic or untested materials are used
  4. Decorative layers are too thick to cure fully

A safer approach is to apply glitter to the inhibition layer or burnish powders onto a cured surface before sealing. This maintains the chemistry of the tested system.

Risks of Improper Nail Product Mixing

  • Allergic contact dermatitis from uncured monomers or unsafe pigments
  • Service breakdown such as lifting, chipping, or cracking
  • Loss of manufacturer support and potential insurance claim rejection
  • Compromised durability from altered product chemistry

Safe Step-by-Step Workflow for Creative Nail Art

  1. Apply and cure your chosen brand’s base and colour coats exactly as directed
  2. Add pigments, powders, or glitters to fully cured surfaces or into the inhibition layer
  3. Seal with the manufacturer’s recommended top coat and cure completely
  4. Finish with cuticle oil to maintain nail and skin health (see our cuticle oil guide)

Final Thoughts

Creativity is essential to nail artistry, but safety must always come first. Mixing nail products for structural enhancements is never safe because it disrupts the chemistry of a tested system and can cause serious problems for the nail and surrounding skin. Mixing nail products for decorative purposes can be safe when cosmetic-grade materials are used sparingly, layers are kept thin, and the curing process is not compromised.

By understanding the science of pigments, glitters, and UV curing, you can produce beautiful, unique designs without sacrificing client safety or your professional credibility.

For more on why brand-specific systems matter and the risks of cross-brand use, see Mixing Different Nail Brands or Products.

Filed Under: Lotions, Potions and Polishes

Hard Gel vs Bottled Builder

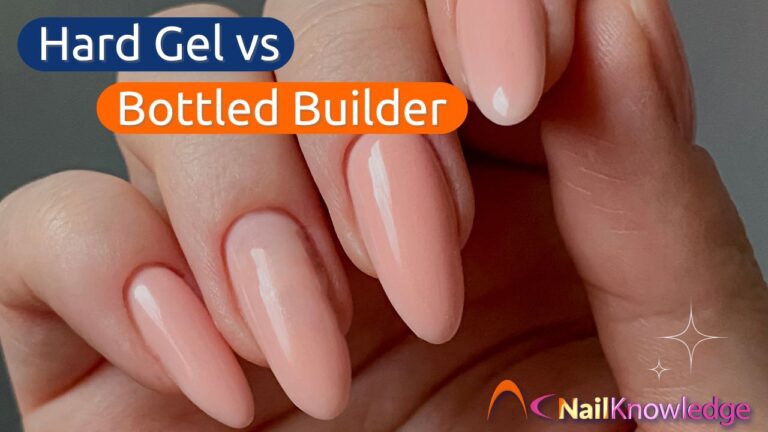
In recent years, the debate of hard gel vs bottled builder has taken centre stage in the nail industry. Though the term “builder” has exploded in popularity, many forget that builder gel has existed for decades, originally in the form of traditional hard gel in a pot. With bottled builders becoming the go-to for many salons, there’s a growing need to revisit the true differences between these products. Whether you’re a seasoned nail technician or still finding your feet, understanding the strengths and limitations of each system is key to delivering the right prescriptive service for every client.

Let’s break it down. Each type of builder gel has its strengths and weaknesses, and the key is to know when and how to use them.

Hard Gel Benefits: Why It’s a Top Choice in the Hard Gel vs Bottled Builder Debate

• Weak or brittle nails – If your client has weak or brittle nails that need extra support and strength, hard gel is a great choice. Hard gel tends to be thicker in viscosity and provides a super strong base, making it ideal for adding extra support and protection to natural nails effortlessly.
• Long Enhancements – Applying hard gel with a gel brush allows for precise application, and easier to control when sculpting and creating desired shapes. Its better suited to longer nail services as structure needs to be created.
• Durability – If your client is looking for long-lasting nail enhancements that can withstand tough daily use, maybe they have an active profession where they are using their hands regularly, then hard gel is the way to go. Hard gel can last up to three to four weeks, making it a durable option for clients who need an impact resistant product.
• Versatility – Hard gel is a versatile product that can be used for a variety of nail enhancements, including nail extensions, overlays, and sculpted nails. It can be easily shaped and filed to create the desired nail shape and length, making it perfect for creating custom nail designs. Used exactly like its bottled sibling is simple, some nail professionals enjoy using a gel brush VS the generic brush found in a bottle.
• Designs – You can mix colours and add glitters and pigments to Hard Gels for a customised look. Encapsulation is a great technique to produce show stopping designs for your customers.
• Professional Finish – Using a gel brush to apply hard gel can result in a more controllable application resulting in a smooth, even finish which also means less filing.

Bottled Builder Gel: When It Wins in the Hard Gel vs Bottled Builder Comparison

• Natural Nail Overlays – Bottled builders are great for clients looking for a simple overlay on their natural nail for added strength and durability. It tends to be thinner and more flexible than a hard gel (although every brand’s formulation differs), making it perfect for a more natural look.
• Quick Application – Some nail professionals will find that a bottled builder is quicker to apply, making it a great choice for a faster nail service. Bottled builders come with a brush applicator like its gel polish cousin, making it easy to apply directly onto the nails without the need for a separate gel brush.
• Portability – Bottled builders are compact and therefore easy to transport, making it convenient for mobile nail technicians or traveling professionals. Due to a huge variety of shades now available transporting a wider range in bottles is far more convenient.
• Removal – Due to the thinner viscosity of these gels, soaking to remove becomes an option. Soaking of these gels will take longer than a gel polish removal due to the strengthening properties, so careful consideration should be made when selecting to either soak off or infill on each service for what is effectively a semi permeant coating.

There’s No One-Size-Fits-All

Understanding the differences between hard gel vs bottled builder is vital for tailoring your service to each individual. There is no universal answer, just the right option for the right nail and client. That’s the beauty of being a well-informed nail technician.

Offering both systems in your salon gives you the ability to prescribe exactly what your client’s nails need, not just what they think they want based on a quick scroll through Instagram. One client might need the rock-solid structure of hard gel for their lifestyle, while another might love the ease and subtlety of a bottled builder.

And let’s not forget, sometimes all a client needs is a good-quality gel polish service. Stronger doesn’t always mean better, especially if the nail bed underneath isn’t ready for it. Think of it like building a house; you need a solid foundation, or the whole thing can crumble. Flexibility is often just as important as strength.

So, next time you’re faced with the choice, ask the right questions. What does the client’s daily routine look like? Do they need strength or flexibility? Longevity or quick removal? Once you answer that, the decision between hard gel vs bottled builder becomes far easier to make.

In conclusion, stay curious and keep learning. Having multiple systems at your fingertips empowers you as a nail professional. Don’t fall into trends without questioning them. And never forget, just because it’s bottled, doesn’t mean it’s better.

Filed Under: Lotions, Potions and Polishes, UV Gel

Essential Oil Safety in Beauty Treatments

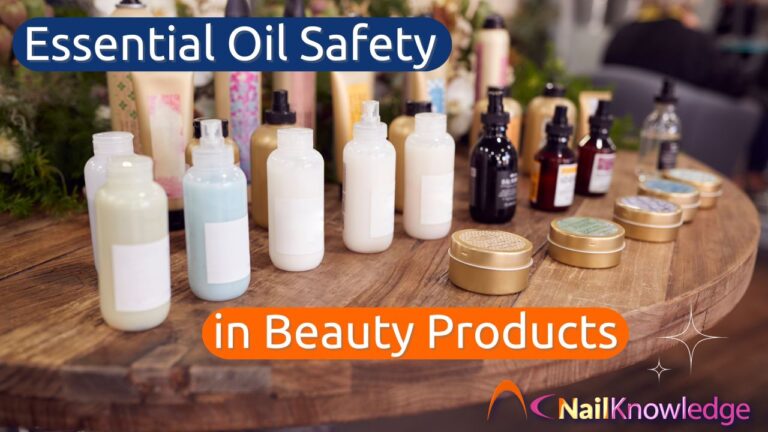
Essential Oil Safety in Beauty Treatments: Separating Facts from Myths

There’s a growing obsession with essential oils these days, especially in the wellness, beauty and nail industries, but essential oil safety in beauty treatments is often overlooked. Somewhere between a natural remedy and a luxury indulgence, they’ve been touted as the answer to everything from stress to skin problems. But as Doug Schoon, a scientist and veteran of the cosmetic and beauty industry, recently highlighted in a now-viral Facebook post, there’s a real need to pause and ask: are we using these oils safely? Particularly when it comes to ingestion and skin contact?

Let’s be clear from the outset. Schoon isn’t against essential oils. In fact, he’s a long-time enthusiast and even a developer of products containing them. What he is against, however, is the rampant spread of misinformation and the dangerous practices that some people have started to adopt, particularly within the beauty community.

The Dangers of Ingesting Essential Oils in Beauty and Wellness

It might sound shocking, but many people are now being encouraged to ingest essential oils as a form of therapy or disease prevention. Just a few drops in a glass of water, they say. Unfortunately, this practice can be more harmful than it appears.

Aromatherapy oils are, by definition, cosmetics. They’re not food, nor are they medicines. While some people claim to be properly trained in the ingestion of essential oils, even they acknowledge the risks. That should be a red flag. Schoon points out that the overwhelming promotion of essential oils online often lacks context, caution and credible backing. Instead, it promotes self-diagnosis and unproven remedies.

Another issue is the use of the term “therapeutic grade”. It sounds scientific, doesn’t it? But here’s the kicker: there is no universally recognised certification for “therapeutic grade” essential oils. It’s a marketing term created by companies to sell more products, not a guarantee of safety or efficacy. The assumption that “therapeutic grade” equals safe for ingestion or medical use is not only misleading, it’s dangerous.

Understanding Essential Oil Composition and Purity Claims

Let’s talk science. Essential oils are not chemical-free. In fact, they’re entirely made up of chemicals. This isn’t a bad thing. Everything is a chemical, from the air we breathe to the water we drink. But when you call something “chemical-free”, you mislead people into thinking it’s somehow gentler or safer. That’s simply not the case.

There are over 3,000 known chemical compounds in various essential oils. Their makeup depends on countless factors: the plant species, the part of the plant used, the soil, weather conditions, harvesting time and even how the oil is stored. Because of this variability, no two batches are ever quite the same.

Purity is often championed as a virtue in the essential oil community, but higher purity can mean higher risk. Undiluted essential oils, while potent, are more likely to cause adverse reactions on the skin or inside the body. That’s why dilution is essential, and not just a recommendation, but a safety requirement.

Topical Use: Essential Oils and Skin Sensitivities in Salons

In beauty salons and nail studios, essential oils are often used in massages, facials, and even incorporated into nail treatments. But few professionals understand the full implications of using them on the skin.

Some essential oils are irritating by nature and can provoke allergic reactions, especially with prolonged or repeated exposure. There’s a common myth that essential oils can’t cause skin allergies because they contain no proteins. Schoon debunks this with an elegant example: nickel causes allergies, and it has no proteins. Irritation and allergic reactions are not signs of “detoxing”, as some believe — they are your body’s defence mechanisms going into action.

For beauty professionals, this means never applying undiluted essential oils directly to the skin. Always use a suitable carrier oil and understand the specific dilution rates for different oils. What works on one client may be harmful to another, especially those with sensitive or allergy-prone skin.

Essential Oil Risks and Gut Health: A Hidden Concern

One of the less-discussed risks is how essential oils can impact gut health when ingested. Experts on both sides of the debate agree that they can disrupt the delicate balance of bacteria in the digestive system. Even though our intestines are home to several pounds of bacteria, ingesting antimicrobial essential oils could tip the scales.

Some proponents argue that essential oils only target “bad” bacteria, not the beneficial ones. But there’s no scientific evidence to support this. If they do act selectively, then they are behaving like antibiotics, and we all know the risks associated with antibiotic overuse. Long-term disruption of gut flora can lead to digestive problems, weakened immunity and more.

Essential Oil Adulteration and Misinformation in the Industry

Another concern is adulteration. Some essential oils are blended with cheaper ones to cut costs. Without lab testing, these changes can go unnoticed. This poses a real risk to professionals who rely on essential oils for treatments, assuming what’s on the label matches what’s in the bottle.

As a beauty or nail professional, it’s your responsibility to trace the source of your essential oils. Buy from reputable suppliers, request certificates of analysis, and avoid those that don’t provide transparent information. Essential oil safety in beauty treatments starts with knowing what you’re using.

The Myth of Natural Equals Safe

“Natural” has become synonymous with “harmless”, but that’s not only incorrect, it’s dangerous. Schoon reminds us that many naturally occurring substances are harmful. Snake venom is natural. Poison ivy is natural. Being natural doesn’t mean something is suitable for skin or safe for ingestion.

Essential oils, though derived from plants, can be potent irritants and toxicants. They can cause blistering rashes, neurological symptoms, gastrointestinal distress and more. The US FDA lists tea tree oil, a popular favourite, as capable of causing a wide range of adverse effects when used improperly.

So when clients ask whether essential oils are safe, the honest answer is: “It depends.” It depends on the oil, the method of application, the dilution, and the person receiving the treatment.

Professional Guidelines and Industry Recommendations

The Alliance of International Aromatherapists (AIA) offers a clear stance. They do not recommend the internal therapeutic use of essential oils unless under the guidance of a qualified healthcare practitioner. This is a critical point for professionals in the beauty and nail industries.

Training matters. And not the kind of training that comes from a weekend workshop or an online MLM webinar. We’re talking about clinical-level education, grounded in biology, chemistry and evidence-based medicine. If someone claims expertise after just a few days of essential oil “training”, be sceptical.

Final Thoughts: Putting Essential Oil Safety First in Beauty Treatments

Doug Schoon’s deep dive into the misuse and misunderstanding of essential oils is a wake-up call for anyone in the beauty and wellness sectors. Enthusiasm should never override caution. Essential oils offer many potential benefits, but they must be used responsibly.

Beauty professionals must educate themselves and their clients. Avoid myths, ignore hype, and prioritise safety above all else. Whether it’s for aromatherapy, skincare or nail treatments, essential oil safety in beauty treatments is not optional, it’s essential.

Before adding a new oil to your treatment menu or recommending one for home use, ask the right questions: Where does it come from? Has it been tested? Is it safe for this use case?

Stay curious, but also stay critical. Because when it comes to essential oils, what you don’t know really can hurt you or someone else.

Filed Under: Lotions, Potions and Polishes

  • « Go to Previous Page
  • Page 1
  • Page 2
  • Page 3
  • Page 4
  • Interim pages omitted …
  • Page 11
  • Go to Next Page »

Level Up Your Nail Insights

Join our Newsletter!
SUBSCRIBE...

Copyright © NailKnowledge

NailKnowledge

  • MyNailEra
  • eBooks
  • About us
  • Courses
  • News
  • Blog
  • Newsletter
  • Glossary

Policies

  • Privacy Page
  • Terms & Conditions
  • Cookie Policy

Support

  • Contact Us
  • Meet the Experts
  • Ask the Experts
  • System Support
  • FAQs
English
English
Portuguese Spanish Vietnamese