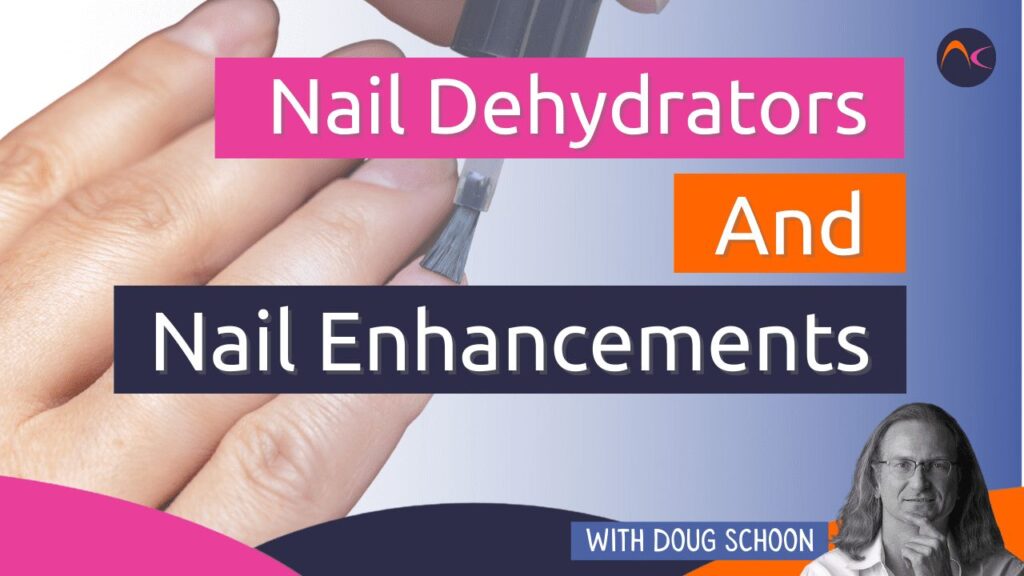
How do nail dehydrators and nail enhancements work together?
Nail enhancements must adhere to the topmost surface of the nail plate. Excessive moisture and oils on the surface can block adhesion by preventing the molecules of the nail coating from physically and/or chemically bonding with the molecules that make up the surface of the nail plate. In a similar manner, butter prevents eggs from sticking to the frying pan; this is where adhesion occurs, between two surfaces. Adhesion happens when two very different surface molecules meet up and their molecules bond together in large numbers.
To “dehydrate” means to remove water from the surface of the nail plate. Removing moisture is the exact same thing, just said differently. This is because moisture is water, and water is moisture. Nail dehydrators are solvents that can dissolve small amounts of moisture. They cause the moisture to evaporate from just the uppermost surface of the nail plate. Nail dehydrators will temporarily dehydrate the upper surface. Within a short time, moisture will begin to migrate back to the nail’s upper surface, which will reverse the dehydration process. This will continue until the surface is rehydrated to normal levels. The rehydration could take up to 30 minutes or more, depending on the moisture content of the nail and the Relative Humidity (RH) of the room.
The nail won’t remain in a dehydrated state for very long, so nail coatings should be applied shortly after the dehydration step is completed. After applying the nail dehydrator, DO NOT physically touch the nail with your fingers since this will re-deposit moisture and oils back on the plate’s surface and cause recontamination. If moisture touches the nail plate, this will immediately reverse any surface dehydration.

Don’t blow on the nail to speed up drying, this just contaminates the nail plate with moisture from your breath. Finally, it is best to use nail dehydrators on clean nails, and NEVER refill the same bottle with fresh product. Why? Nail dehydrators will also remove surface oils. That’s not its function, since dehydration is the removal of “moisture”. Even so, if the nail plate is not properly pre-cleaned to remove surface oils, residual oils can block adhesion.
Hand washing using a clean and disinfected soft bristle nail brush is a great way to ensure these surface oils have been removed so that proper adhesion can develop. If these surface oils are not properly removed before using a brush-on nail dehydrator, they will be picked up and dissolved by the nail dehydrator, along with the moisture. When the brush is dipped back into the bottle, these oils are transferred into the bottle or other container. Over time, the nail oil concentration inside the container can increase. After a while, the oil concentration inside the container can become so high that each brushstroke of the nail dehydrator re-deposits MORE nail oil onto the nail plate than is removed. When this occurs, adhesion to the nail plate can be compromised and lifting may result.
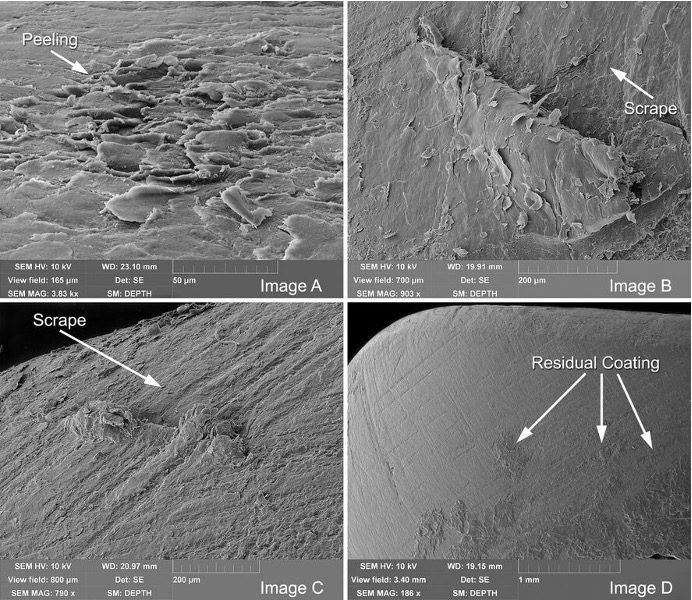
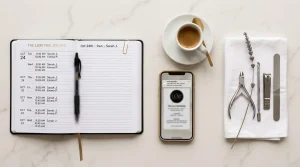
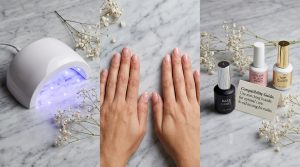
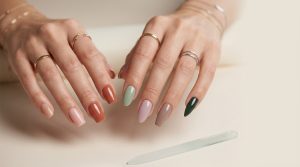
It’s a myth that nail dehydration causes permanent white spots on the surface of the nail. Dehydration of the nail plate only occurs at the topmost surface and is only temporary. Dehydrating the nail’s surface does NOT cause permanent damage. Permanent damage is more properly attributed to physical trauma caused by scraping, prying, or picking nail coatings from the nail plate as shown in images A-D.