• Skip to primary navigation
  • Skip to main content
  • Skip to footer
NailKnowledge

NailKnowledge

  • Courses
  • MyNailEra
  • Free eBooks
  • Knowledge Base
    • Knowledge Base
    • Ask the Experts
    • Glossary
  • News
  • Blog
  • Login

Lotions, Potions and Polishes

Can Bacteria and Infections Be Passed from Gel Bottles?

When a client raises concerns about a potential nail infection following a gel manicure, it can feel both frustrating and worrying, especially when you know your hygiene standards are impeccable. A common question that arises in these situations is:

“Can bacteria be passed from gel polish bottles or brushes?”

The short answer? It’s highly unlikely.

Infection Risks from Gel Bottles and Professional Responsibilities

Let’s break this down step by step, exploring the science behind gel polish, infection risks, professional responsibility, and how to address client concerns with confidence.

1. The Science Behind Gel Polish: An Inhospitable Environment for Bacteria

Gel polish is more than just a cosmetic product, it’s a carefully formulated chemical system. Its core ingredients, including ethyl methacrylate, isopropyl alcohol, and photoinitiators and more, create an environment where bacteria struggle to survive.

  • Solvent Power: The solvents in gel polish or standard polishes are inherently antimicrobial, meaning they kill or inhibit the growth of bacteria and other microorganisms.
  • Double-Dipping: When you dip a brush back into the gel bottle after applying polish to a client’s nails, any bacteria present on the brush would immediately encounter these solvents. Survival in such a chemical-rich environment is highly unlikely.
  • Curing Process: Once applied, gel polish is cured under UV or LED light, which hardens the product and further eliminates any potential for bacterial growth.

In short: Gel polish bottles and brushes are not viable hosts for bacterial infections.

However, this is critical, as just because the product itself is inhospitable to bacteria doesn’t mean we can become complacent about hygiene standards or ignore nail health concerns.

2. Our Professional Responsibility: Only Work on Healthy Nails

As professional nail technicians, our duty extends beyond applying beautiful nails, it’s about protecting our clients’ health and wellbeing.

We must only ever work on healthy nails.

If there is any doubt about the health of the client’s nails, be it signs of infection, trauma, or any abnormality, the safest and most professional action is to not proceed with the service and recommend they seek medical advice.

The assumption that “bacteria or pathogens won’t thrive in the bottle due to the chemicals, so it’s a risk that can be taken” is absurd and irresponsible.

Hygiene First, Always:

  • Every tool and brush must be sanitised and sterilised or disposed of accordingly.
  • Workspaces must equally be kept disinfected and immaculate.
  • Hands (both technician’s and client’s) must be properly sanitised before the beginning the service, and even at the end where possible.
  • Any visible nail or skin abnormality must trigger a pause, assessment, and, if necessary, a referral to a healthcare professional.

Maintaining hygienic practices and working solely upon healthy nails minimises, or even abolishes, the risk of bacterial contamination, regardless of how inhospitable the product may be.

If Not the Gel, Then What? Common Causes of Nail Infections

While gel polish itself isn’t a likely culprit, nail infections can arise from other factors. Here are the most common causes:

  • Uncured Gel Polish
    If gel isn’t fully cured under UV/LED light, it can remain tacky and trap moisture—a potential breeding ground for bacteria and fungi.
  • Improper Nail Preparation
    Skipping essential steps like cleansing and sanitising the nail plate before applying coatings can leave bacteria or fungi behind.
  • Contaminated Tools
    Reusable tools that aren’t properly disinfected or sterilised can transfer bacteria or fungi from one client to another.
  • Nail Trauma or Damage
    Over-filing, aggressive cuticle removal, or accidental nicks during the service can expose the nail bed and/or surrounding skin to opportunistic pathogens.
  • Pre-existing Conditions
    Clients who already have fungal infections or compromised nail health are naturally more prone to further complications.
  • Allergic Reactions
    Sometimes, what appears to be an infection might actually be an irritation or allergic reaction to one of the ingredients within the nail coating.
  • Poor Aftercare
    Clients who expose their nails to prolonged moisture, harsh chemicals, or neglect aftercare advice may experience nail health issues post-manicure.

Each of these factors could lead to symptoms like redness, swelling, or discomfort, which may mimic an infection.

How to Professionally Address Client Concerns

Handling these situations with professionalism, empathy, and education is key. Here’s how:

Step 1: Acknowledge Their Concern
Start by thanking your client for bringing the issue to your attention. Reassure them that their concern is being taken seriously.

Example:
“Thank you so much for letting me know about your concern. I take issues like this very seriously, and I want to make sure we address it together.”

Step 2: Educate with Confidence

Share the science behind polish and its antimicrobial properties. Explain how uncured gel, pre-existing conditions, or other factors are more common culprits for infections.

Example:
“Gel polish itself isn’t a hospitable environment for bacteria due to its chemical composition. However, infections can sometimes arise from other factors, such as trauma to the nail, pre-existing conditions, or aftercare habits.”

Step 3: Offer Support and Encourage a Medical Diagnosis

If a client’s symptoms persist or worsen, it’s important they consult a healthcare professional for an accurate diagnosis.

Example:
“I’d recommend visiting a medical professional to confirm if there’s an infection and identify the exact cause. This will help us both understand what might have happened.”

Step 4: Reinforce Your Hygiene Standards

Use this opportunity to reassure your client about your commitment to hygiene and safety.

Example:
“In my salon, I follow strict hygiene protocols, including sterilising tools, sanitising workstations, and following manufacturer guidelines for all products.”

Final Thoughts

While gel polish bottles and brushes are not a likely source of bacterial contamination, infections can still arise from other factors.

But more importantly:

  • We must never assume risk is acceptable just because the product reduces it.
  • We must always uphold the highest standards of hygiene and professionalism.
  • We must only work on healthy nails, with no exceptions.

This approach not only ensures client safety but also protects your professional reputation and credibility.

Professionalism, education, and accountability are the cornerstones of our industry. Let’s continue to uphold them with pride.

Stay educated and stay professional.

Filed Under: Lotions, Potions and Polishes, Nail Services, UV Gel

Can I Cure Nail Polish in a Lamp?

Nail enthusiasts often wonder, “Can I cure regular nail polish in a UV/LED lamp?” 
The short answer is no, but the long answer requires a deeper dive into why this is not an ideal practice. While gel polishes are designed specifically for UV/LED curing, traditional nail polish is formulated differently. Let’s explore this topic in detail, covering the science, risks, and alternatives.

What Is the Difference Between Regular Nail Polish and Gel Polish?

Before understanding if you can cure nail polish in a lamp, it’s important to grasp the fundamental difference between regular nail polish and gel polish.

  • Traditional Nail Polish: This air-drying polish relies on solvent evaporation to harden. It contains no ingredients that react to UV/LED light.
  • Gel Polish: This is a special formula designed to cure under UV or LED light. Gel polish contains photoinitiators that activate under light exposure, causing the polish to harden almost instantly.

Traditional nail polish simply doesn’t have the chemical components necessary to benefit from UV/LED exposure. Trying to use a lamp with traditional polish is merely a fruitless exercise. Some UV/LED lamps emit warmth/heat that may support the evaporation of the polish solvents to a small degree or this method may be used to keep a client with a fidgety hand to remain still, but either way does not assist the overall drying of the polish. 

Can You Put Regular Nail Polish in a UV/LED Lamp?

Technically, you can place traditional nail polish in a UV/LED lamp, but it will not cure it properly. Traditional polish needs air to gradually evaporate its solvents, and a UV/LED lamp would only speed up the solvents evaporating if the lamp is emitting any warmth. This may create a superficial drying effect on the top layer of polish, leaving the bottom layers wet and soft.

If the base layers aren’t dry, this can lead to:

  • Smudging
  • Uneven texture
  • Short-lived manicures

What Are the Risks of Using a UV/LED Lamp on Regular Nail Polish?

Using a UV/LED lamp with regular nail polish isn’t just ineffective; it can also come with risks.

  1. Prolonged Drying Times
    Instead of speeding up the drying process, UV/LED exposure might leave your polish tacky for longer, as it interrupts the natural evaporation process.
  2. Discoloration or Degradation
    Regular polishes are not designed for UV exposure and may break down or change colour when subjected to UV/LED light.
  3. Damaging Your Lamp
    Over time, using traditional nail polish in a lamp simply is a waste of the lamp’s working hours, which is best saved for the gel products it was designed for.

Why Do Some Professionals Use Traditional Polish with UV/LED Lamps?

You may have seen nail technicians applying traditional nail polish with UV/LED lamps and wonder how they make it work. The trick lies in the technique.
Some professionals use a “gel sandwich” method, where they:

  1. Apply a gel base coat and cure it.
  2. Add a thin layer of regular nail polish and let it air-dry fully (Which takes time).
  3. Seal with a gel top coat and cure.

This method allows for the use of regular colours, however, it’s important to note that the regular polish must be completely dry before applying gel layers. Even light dampness can cause bubbling, peeling, or lifting, it is certainly not a fully trusted method. It is always best practice to use products according to the manufacturer’s instructions vs playing chemist with professional products. 

What Is the Best Alternative to Curing Regular Nail Polish?

If you want the benefits of a UV/LED manicure while using traditional polish, there are safer and more effective methods:

  • Hybrid Polishes
    Some brands offer hybrid nail polishes designed for UV/LED curing. These products combine the thinner, swifter removal, and flexibility experienced with regular polish with the durability of gel.
  • Quick-Dry Top Coats & sprays
    If you’re looking to speed up drying times, a quick-dry top coat for traditional polish is a better option than using a UV/LED lamp. Also available are quick dry drops or sprays which speed up the evaporation of the solvents within the polish. 
  • Application Methods 

Get the best results and fast dry times by elevating your application methods. Ensure the nail is clean and dry, ready for the polish to be applied, applying in multiple thin layers, allowing each layer to almost dry, preventing any postman blunders.    

What Happens If You Use the Wrong Product in a UV/LED Lamp?

If you use a product not designed for UV/LED curing in a lamp, several things can go wrong:

  • Incomplete Curing: The polish may remain soft or sticky, resulting in smudging.
  • Bubbling or Lifting: Improper curing can cause air pockets that weaken the manicure.
  • Wasted Time: You won’t achieve the long-lasting, glossy finish you expect from gel polishes.

Final Verdict: Can You Cure Nail Polish in a Lamp?

While it’s tempting to use a UV/LED lamp for regular nail polish, the results won’t be what you’re hoping for. Traditional polishes are not designed for curing under UV/LED light, and attempting to do so can lead to disappointing results and potential risks.

If you’re looking for the durability and shine of gel nails, it’s best to stick with products formulated for UV/LED curing. Alternatively, use hybrid polishes to combine the best of both worlds.

For a flawless manicure, the right tools and products make all the difference. Now you know the science and risks behind curing regular nail polish in a UV/LED lamp—so you can make the best choice for your nails!

Filed Under: Lotions, Potions and Polishes, Nail Services, Nail Technology

Understanding Formaldehyde Levels in Nail Salons

Formaldehyde is a naturally occurring chemical compound found in many everyday environments. While it has gained a negative reputation, particularly in the beauty industry, it’s important to distinguish between fear-based misinformation and scientific facts. In nail salons, concerns about formaldehyde levels are often based on misconceptions. This article explores the truth behind formaldehyde use in nail products and clarifies whether it poses any genuine risk to nail professionals or clients.

Are Formaldehyde Levels in Nail Salons Unsafe?

No, formaldehyde is not a problem in nail salons and never has been. The so-called risk of formaldehyde in nail polish campaigns was designed to mislead consumers, not to inform them. Here’s why I say this: a multi-year independent scientific study was performed under the guidance of the California State Attorney General with the goal of measuring formaldehyde levels in salons.

Formaldehyde Levels in Salon Environments

Many sizes and types of salons were tested in both Northern and Southern California and during the winter and summer, which is why it took more than a year to complete. The study demonstrated conclusively that formaldehyde levels in nail salons are no different than what would be expected in other common workplaces where nail products were not in use. Interestingly, during the study, it was observed that the formaldehyde levels were highest in the morning when the salon first opened and then dropped off steadily throughout the morning, leveling off at their normally low levels in the afternoon.

Why Formaldehyde Can Build Up Overnight

When the salon was closed for the night, traces of formaldehyde gas can build up as they normally do in closed spaces. Traces slowly escape from carpet glue and building materials, such as plywood. When a salon is opened and the air begins to circulate, the formaldehyde levels drop back down to normal levels. Even so, all the measured air concentrations in the nail salon study were considered safe.

Official Findings on Nail Salon Safety

When the study was concluded and the final report was issued, the California governmental authorities ruled that based on extensive salon exposure data, any formaldehyde levels in salons from nail polish, treatments, and hardeners were so low that no consumer warnings are required. In other words, nail polish does not release formaldehyde gas into the air to create any health risk whatsoever, even under what is probably the most stringent formaldehyde regulation in the world.

Misconceptions About Formaldehyde in Nail Products

This is because nail polish has never contained formaldehyde gas as an ingredient. Fear-based advocacy groups have tricked consumers into thinking that it does, but it’s just a big deception intended to frighten your friends, family, and customers to get them to donate money. Any gases in nail polish could only exist in very tiny traces, e.g., 0.0001% or a ten-thousandth of a percent!

Understanding Tosylamide Formaldehyde Resin

Some confuse a hard polymer resin called tosylamide formaldehyde resin, thinking this solid polymer is the same as formaldehyde gas. It’s not even close. It can be a source of traces of formaldehyde dissolved in solution, but these are very safe levels and will not cause harm. Some claim these are dangerous because they release formaldehyde – well, so do people. We naturally exhale traces of formaldehyde in our breath because our bodies naturally make and use formaldehyde on a daily basis.

Formaldehyde as a Potential Allergen

While the levels of formaldehyde found in salons are generally considered low and safe, it’s important to acknowledge that formaldehyde is a known sensitiser and allergen for some individuals. Prolonged or repeated exposure, even at low levels, can trigger allergic contact dermatitis, particularly in those with existing sensitivities. Symptoms may include redness, itching, or rash, especially on the hands and fingers. For this reason, professionals who experience skin reactions should consult a healthcare provider and consider using gloves or alternative products that are free from formaldehyde-releasing compounds.

Clarifying Methylene Glycol and Formaldehyde Levels

Some nail hardeners contain “methylene glycol” at around 1-2%. In the past, manufacturers were required to call this ingredient by the incorrect name, “formaldehyde,” rather than its correct name, “methylene glycol.” This error has since been corrected, but it’s probably where the confusion began. Even when informed of their error, some advocacy groups continued to ignore the facts and spread misinformation.

Debunking Misinformation About Formaldehyde Levels

These groups claimed that up to 5% formaldehyde was used in nail polish, which was another huge distortion. When methylene glycol is used as a nail hardener, usually at 2% or less, the container typically contains less than 0.001% dissolved formaldehyde gas – not nearly enough to cause any harm. Even if all the formaldehyde suddenly came out at once, it still wouldn’t be harmful. Our bodies naturally exhale formaldehyde with every breath, and it’s even found in some organic foods like apples.

Safe Formaldehyde Levels in Nail Salons

Formaldehyde is not the terrible boogeyman these irresponsible groups claim it to be. The claim that there are no safe levels of formaldehyde is simply not true. Formaldehyde does not absorb through the skin or nails, as some falsely claim. It only poses an inhalation risk at high concentrations over long periods – levels that would never be reached in a nail salon.

Conclusion: Trust the Facts About Formaldehyde Levels

Clearly, nail professionals are not exposed to significant amounts of formaldehyde gas, nor is there any risk of harm from the tiny traces found in salons or nail polish. Nail salons do not need to monitor formaldehyde levels because the risk is negligible. Don’t let fear-based groups mislead you – nail polish has been safe for over 80 years, and there’s no evidence to suggest otherwise.

Filed Under: Lotions, Potions and Polishes

Cuticle Oils: Why ‘Dead’ Nails Still Desperately Need Them!

We get asked this a lot: “If the nail plate is ‘dead,’ does cuticle oil really work?” It’s a valid question, and the terminology floating around online can often be confusing or misleading. The truth is, while the nail plate is made of dead keratinised cells, that doesn’t mean it doesn’t benefit from proper care.

So, let me clear things up and give you my best advice on why nail oils are essential and how they actually work.

Nails Are ‘Dead,’ But That Doesn’t Make Them Immune to Damage

It’s true that the nail plate is composed of dead, keratinised cells. However, the fact that it’s ‘dead’ tissue doesn’t mean it’s unaffected by day-to-day life. Think of your hair—also ‘dead’ keratinised cells. We still shampoo, condition, and even apply masks and oils to moisturise – to improve its look, feel, and resilience. The same applies to our nail plates. They might not be “alive,” but they can still become dry, brittle, and prone to breakage due to environmental factors, repeated chemical exposure, or just everyday wear and tear.

What Is the Cuticle and What Is the Nail Plate?

The Cuticle: The cuticle is a thin layer of dead, very sticky skin cells produced by the eponychium hitching a ride out along with the growing nail plate, forming a protective seal at the base of the nail. While important as a barrier, this non-living tissue can be safely removed or softened and gently lifted during professional services to prevent the lifting of nail coatings and to keep the area aesthetically tidy.

The Nail Plate: The nail plate itself is a stack of flattened, keratinised cells that emerge from the matrix. Although it’s ‘dead’ tissue, it still thrives when it’s maintained at an optimal moisture and oil balance. This condition makes it stronger, more flexible, and less likely to peel or crack.

From ‘Cuticle Oil’ to ‘Nail & Skin Oil’

Many top brands have moved away from calling it “cuticle oil” and now refer to it as “Nail & Skin Oil.” I’m quite passionate about this language evolution. This shift in terminology is more than just marketing. It recognises that the true value is in hydrating and protecting both the nail plate and the surrounding living skin structures—such as the lateral nail folds, the proximal nail fold (PNF), and the hyponychium. These areas are very much alive and form essential protective seals that help guard the delicate matrix where the nail is formed and grows.

In truth, we remove the actual cuticle (which is non-living, sticky tissue that forms an important seal), so moisturising the “cuticle” itself doesn’t make sense. Instead, we focus on conditioning the living skin around the nail and the nail plate itself, maintaining a healthier, more flexible, and less damage-prone environment.

How Certain Oils Penetrate and Protect

Not all oils are created equal. Some, like jojoba and avocado oil, contain smaller or more elongated molecular structures that can penetrate more easily into the superficial layers of the nail plate and the surrounding skin. They won’t dive deeply into the centre of the nail plate the way water might seep into a sponge, but they can and do move into the upper layers with repetitive application. This penetration helps lock in moisture, providing flexibility and protection against brittleness and breakage.

Tocopherol (vitamin E) molecules, on the other hand, are larger and struggle to fully penetrate on their own. However, they’re still incredibly beneficial. When blended with natural oils, tocopherol can “hitch a ride,” allowing some of it to settle just beneath the surface. This is actually where it’s needed most—to provide antioxidant protection near the nail’s surface, helping safeguard against discolouration, UV damage, and brittleness over time.

Three key moisturising categories

Emollients, humectants, and occlusives are three categories of moisturising ingredients that work together to maintain healthy nails and skin. Emollients help smooth and soften by filling in tiny gaps between cells, improving flexibility and texture. Humectants draw moisture into the nail plate and surrounding skin, ensuring it remains hydrated. Occlusives create a protective barrier that seals in this moisture, preventing it from escaping too quickly and shielding against environmental stressors. High-quality nail and skin oils often contain a blend of these ingredient types to provide a balanced approach—nourishing the nail plate, maintaining the skin’s integrity, and promoting a well-hydrated, resilient surface.

  • Emollients: Smooth and soften by filling in tiny gaps between cells, improving flexibility and texture.
    Examples: Jojoba oil, Avocado oil, Almond oil, Squalene
  • Humectants: Draw moisture into the nail plate and surrounding skin, ensuring it remains well-hydrated.
    Examples: Glycerin, Hyaluronic acid, 
  • Occlusives: Create a protective barrier that locks in moisture, preventing it from escaping and shielding against environmental factors.
    Examples: Lanolin, Shea butter, Petroleum Jelly, Cocoa Butter

Why Use Conditioning Oils?

Conditioning oils don’t just sit on top; they help create a more flexible, impact-resistant environment. This flexibility reduces the chance of breakage and can improve the longevity of your manicure, whether you wear polish, gel, enhancements, or just go Au Natural. Furthermore, the oils help maintain the health of the surrounding skin, encouraging proper barrier function, reducing hangnails, and promoting an overall healthier nail unit.

In other words, while the nail plate isn’t alive, it’s still receptive to what you apply. These targeted oils enhance appearance, support durability, and protect against external stresses. When combined with regular use, you create a consistent layer of defence—like conditioning your hair regularly so it stays shiny, flexible, and resilient.

In Conclusion:

  • Yes, the nail plate is ‘dead’—but it still benefits from oils to maintain flexibility and prevent damage.
  • ‘Nail & Skin Oil’ is a more accurate term than ‘cuticle oil’ because we focus on living skin around the nail and the nail plate itself, not the removable cuticle.
  • Certain oils, like jojoba and avocado, do penetrate and condition the nail’s top layers and surrounding skin. Tocopherol (vitamin E), especially when carried by these oils, protects and prevents unwanted chemical reactions at or near the surface.

Filed Under: Lotions, Potions and Polishes

Non-Wipe Top Coats: Clearing Up the Confusion

We get asked this question a lot: “Do non-wipe top coats really need to be wiped?” With so much conflicting information out there, it’s understandable to feel unsure. Safety is essential, and knowing the facts helps protect both you and your clients from potential allergies or irritation.

To help clear things up, here’s a detailed breakdown of non-wipe top coats, why some people still choose to wipe, and how to use them safely and effectively.

What is a Non-Wipe Top Coat?

  1. Non-wipe top coats are designed to cure completely without leaving a sticky or tacky inhibition layer after being cured under a UV or LED lamp.
  2. This means, in theory, you do not need to wipe the nail with alcohol or any cleanser after curing.

Why Some People Might Still Wipe

  1. Misunderstanding: Some people may be used to traditional top coats (which do leave an inhibition layer) and automatically wipe without realizing it’s unnecessary.
  2. Shine or Texture Preference: Occasionally, people feel that wiping enhances the shine or feel of the top coat. However, for genuine non-wipe top coats, this step is unnecessary.
  3. Safety Concerns: Some technicians worry that uncured product might be left behind, causing allergies or contact dermatitis. However, if the product cures correctly under a calibrated UV/LED lamp, it should be fully set, and no harmful substances should remain. If you are worried about the incidences of allergies then continue to wipe over the cured coating just in case there is any uncured material. Remember to wipe from base to the tip each time and start with little finger

Best Practices for Using a Non-Wipe Top Coat Safely

  1. Follow Manufacturer Instructions: Ensure you are using a top coat specifically formulated as a non-wipe product. Always trust the manufacturer’s guidelines and use the correct curing times and lamps they recommend.
  2. Proper Curing: Ensure your UV/LED lamp is suitable (check wattage and cure times). An under-cured product can lead to uncured monomers causing skin irritation or allergies.
  3. Check the Surface: After curing, if the nail feels fully smooth and dry, there’s no need to wipe. If it feels tacky, there may be an issue with the curing process, or it might not be a true non-wipe formula.
  4. Regularly Test Your Lamp: Over time, lamps may lose their efficiency. Ensure your lamp is functioning well to avoid incomplete curing.
  5. Allergy Awareness: If you or your clients have sensitive skin, make sure to avoid direct skin contact with the uncured product, as this can increase the risk of allergies.

Conclusion

If your top coat is labeled as a non-wipe product and you are using it correctly with a properly functioning lamp, there’s no need to wipe. Inconsistent advice may come from misunderstandings or concerns about proper curing. Trust the product guidelines and ensure good curing practices to keep yourself and your clients safe.

If you still feel uncertain, consider reaching out directly to the manufacturer’s customer support for clarification or additional advice tailored to their product.

Filed Under: Lotions, Potions and Polishes

Why You Should Never Use Craft Glitter in Nail Products

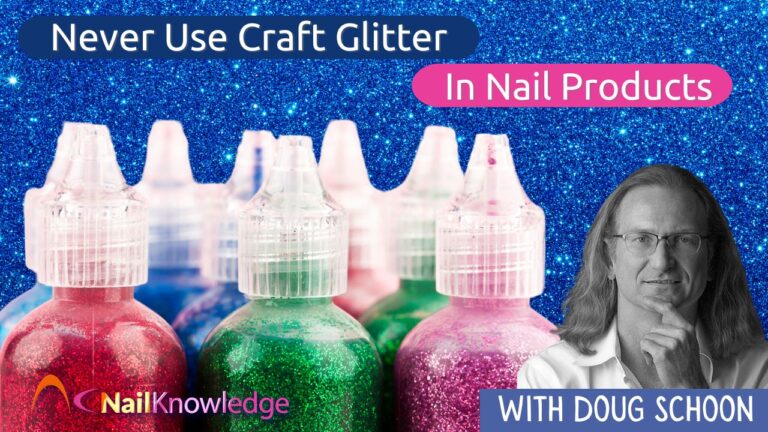
We get asked this question a lot: “Can I use craft glitter with nail products instead of glitters made specifically for nails? Aren’t they basically the same thing?” While it might seem like a harmless swap, there are some important reasons why craft glitters should never be used in nail applications. Let’s dive into the details to clear up any confusion and explain the potential risks.

Why Only Cosmetic-Grade Glitters Are Safe for Nails

In my opinion, craft glitters sold for arts and crafts should not be used for nail art application and should never be mixed with nail products. I recommend using only glitters and other colorants that are cosmetic-grade. Not just any cosmetic-grade colorant, you should only use those that are specifically sold for use in nail coating cosmetics. Why? There are several good reasons for why I believe this to be true. Many countries, including the US, Canada, Australia and those of the European Union and others have specific regulations concerning which types of colorants can be used in cosmetics. This is done to ensure safety. Those used for crafts or other non-cosmetic uses are not designed for the type of contact that can occur with cosmetics and may cause adverse skin reactions. 

A Real-Life Warning: Allergic Reactions from Craft Glitter

An example of what can happen when improper colorants are used. This was reported in a highly respected medical journal in 2012. Several physicians reported a case-study involving a patient that had come to them with an allergic reaction after wearing UV gel nail coatings for about a year. This 37-year-old housewife had never before experienced any type of allergic skin reaction. For three months, she received artificial nail services from a nail professional and then decided that she could “do it herself”. That was the first mistake she made. After about seven months, she developed multiple, intensely itchy sores on the skin surrounding her nail plates and on the palms of both hands.

To determine why she was experiencing this adverse skin reaction, her doctor did a standard skin patch test, this testing exposed her skin to small amounts of a wide range of common allergy producing substances, as well as the nail product she was using.

The test results were surprising. The skin testing showed she was NOT reacting to the nail coating product at all, as the doctors may have first suspected. Instead she was having a surprisingly strong allergic reaction to another common allergy producing substance included in the patch testing. She reacted strongly to a substance called “cobalt chloride”, which seemed rather odd, until the patient was questioned further.

 The doctor learned she had purchased some “craft glitters” from the Internet and had been mixing up her own color blends which she applied to her own nails. That was her second mistake. Upon further investigation, it was learned that “cobalt” was listed as an ingredient in the glitters. The cobalt ingredient in the craft glitters was entirely responsible for her allergic skin reaction. Once she stopped using the craft glitters, these skin problems disappeared.

The Dangers of Non-Cosmetic Colorants in Nail Products

Cosmetic colorants don’t contain cobalt, nickel, chromium, or other such metals, because these are known to cause allergic skin reactions. Not all metals cause skin allergies. Titanium is an example of one that does not. These allergy causing metals and their derivatives should never be used in any cosmetic products. Even inhaling the dusts of these allergy causing metal colorants can be unsafe. It also is important to understand that not all cosmetic colorants are useful for nail application.

Some contain special additives that can contribute to nail coating service breakdown. For example, some cosmetic colorants have a silicone surface-coated which can block adhesion and contribute to lifting problems. While others contain additives that allow them to be dispersed in water, making them incompatible with nail coating products. Using these can weaken the nail coating and make them more likely to crack or break.

Why Trusted Brands and Authorized Dealers Matter

Responsible manufacturers select and test glitters and color pigments before selling them; they choose those that are safe for use and those which are compatible with nail coating products. This takes out the guess work and helps protect the safety of nail professionals and their clients. Now you can see why I recommend that nail professionals only use glitters and colorants specifically designed for nail products. But there’s more, I recommend purchasing only from the manufacturer or their authorized dealers. The Internet is filled with counterfeit products that can be unsafe and may contain potentially hazardous substances that should NOT be used in cosmetic products.

Avoid Counterfeits: Stick to Authorized Distributors and Trusted Brands

I wrote an Education Update that warns salon professionals about this issue. In that Update I recommend avoiding purchasing any professional salon products from the Internet unless the product is sold by an “authorized” distributor. Counterfeits are often sold by unauthorized dealers, so beware! These can be found all over the Internet. I also recommend sticking to respected, brand name products. Otherwise, you never know what you’re getting or what’s being used in your services. They may seem cheaper, but they are cheaper for a reason. Most of the time, the safe ingredients have been substituted for cheaper ingredients that may be unsafe.

Filed Under: Lotions, Potions and Polishes

  • « Go to Previous Page
  • Page 1
  • Page 2
  • Page 3
  • Page 4
  • Page 5
  • Page 6
  • Interim pages omitted …
  • Page 11
  • Go to Next Page »

Level Up Your Nail Insights

Join our Newsletter!
SUBSCRIBE...

Copyright © NailKnowledge

NailKnowledge

  • MyNailEra
  • eBooks
  • About us
  • Courses
  • News
  • Blog
  • Newsletter
  • Glossary

Policies

  • Privacy Page
  • Terms & Conditions
  • Cookie Policy

Support

  • Contact Us
  • Meet the Experts
  • Ask the Experts
  • System Support
  • FAQs
English
English
Portuguese Spanish Vietnamese