The term ‘gel manicure’ is commonly used as a nail service that provides a UV cured colour coat on the nails. It is not usually a traditional manicure as it may only provide work on cuticles, nail shaping, and, sometimes, a hand massage with suitable creams.

Importance of the UV Gel Manicure in the Beauty Industry
A UV gel manicure is the most popular nail service and has been for the last few years since it was introduced around 10 years ago. It is so popular with clients for several reasons, the main three being:
1. it is instantly dry so no waiting or polish to dry before leaving the salon
2. it should stay perfect for 2-3 weeks with no chipping nor loss of shine.
3. It can strengthen nails and avoid breakages
It does, however, have some downsides:
1. It commits the client to revisit the salon every 2-3 weeks for removal or maintenance so there is a time and cost investment
2. The must be some simple home care steps to follow to keep the manicure and natural nails in top condition
3. It cannot be removed safely at home without some nail damage
4. Some brands require buffing of the natural nail and, over the nail. and multiple manicures can result in the thinning of the natural nail.
However, this can be compared to having hair coloured i.e., it should only be carried out by a skilled professional, maintained by the same hairdresser and there is some compromise to be made with the condition of the hair that needs home care.
Understanding the UV Gel Manicure
A UV gel polish, like traditional nail polish, is a type of plastic. It comes in a semi-liquid form, allowing it to be painted onto the natural nail in a thin coating. To set the gel, it needs to be cured under a lamp emitting UVA light. Curing is the scientific term for the process of transforming the semi-solid gel into a hard, solid state
Comparing Regular Nail Polish and UV Gel Polish
Regular nail polish is another type of plastic, and it dries in the air as it contains solvents that evaporate, leaving behind a colored plastic coating. It can be easily and quickly removed with a solvent-based polish remover that breaks the bonds between the molecules.
A UV gel polish achieves a similar result, but unlike regular nail polish, it does not contain solvents (unless it is a hybrid gel polish). Instead, it contains special ingredients that react with UVA light to facilitate drying. When it comes to removal, the process remains the same using solvent removers, but it requires a longer contact time with the solvent to break its bonds and aid in the removal process.
Understanding UV Gel Polish and Lamp Technology
To achieve instant drying, a UV gel polish incorporates ingredients that react with UV light, transforming it into a solid state.
Most brands now utilise lamps with LED bulbs, which are still UV but no longer use tubes with gas due to environmental concerns. These LED bulbs consume less electricity and are more eco-friendly.
The bulbs in the lamps should only emit UVA light, which does not cause a tanning effect. However, prolonged exposure to UVA light can lead to minimal aging effects. Notably, a typical gel manicure session lasts around 3 minutes (or slightly longer if nail art is applied). Research suggests that having two gel manicures a month is equivalent to an additional 2 minutes of exposure to daylight each day.
For clients concerned about UV light exposure, wearing fingerless gloves or using SPF protection (while avoiding direct application to the nails) is a perfectly acceptable precaution.
Preparing for a Gel Manicure Service
Educating Clients on Pre-Manicure Nail Care
The health of the natural nail should be the nail professionals number 1 focus. Skilled application and removal should not cause any changes in the condition of the nail.
However, it is important that the manicure is only applied to healthy nails. Any nails that have an unwanted condition, such as lifting from the nail bed, discolouration, thin or weak nails etc. Sometime this nail service must be refused due to poor condition of the nails. This ensures that any condition is not made worse by the service. Some may need extra help with specific UV gel products to provide extra strength or to smooth a distorted nail plate. Without this extra help, thin and wet nails are not usually suitable for a UV gel manicure as the nail is too bendy for the more rigid coating.
If a service is refused it is the nail professional understanding nail conditions and preserving the health of the nails for the benefit of their client
Proper Removal of Existing Nail Products
For a UV gel manicure all existing coatings should be removed first. Some brands do allow for an ‘infill’. This is where the coating is not removed but the new growth area is covered with a new application of the colour. This is not always recommended, especially if the colour is opaque as the condition of the nail plate should be checked every 2-3 weeks and this can only be done with a clear coating.
Shaping and Filing Techniques for Gel Manicures
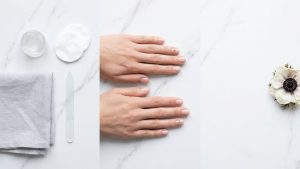
After inspection of the nail plate to check its condition and health, the nails should be shaped according to the clients wishes and the free edge cleaned to remove any loose nail or dirt.
Cuticle Care and Safe Cuticle Removal Practices
A very important series of steps in the process is to prepare the nail plate so that the coating will adhere to the nail surface without lifting or chipping.
The cuticle is a thin and clear layer of non-living skin that sits on the nail plate and is shed by the living skin at the base of the nail, which is actually called the proximal nail fold and NOT the cuticle as many believe. UV gel polish does not adhere to the skin only the nail plate so this thin layer must be very carefully removed without any damage to the nails. This is usually achieved by a cuticle tool or, sometimes by an electric file. Both are safe inexperienced hands. The use of an electric file requires extra training onto of manicure training so clients should ensure their nail tech has a suitable qualification.
There should be no removal of the band of clear ski at the base of the nail using nippers or scissors. This skin is still living and forms a very important seal that prevents pathogens (germs) from reaching the matrix where the nails are grown.
Ensuring Sanitary Conditions in the Salon
The last step before application and after cuticle work is the cleaning of the nail plate. It must have no oils nor moisture on it as these will create a barrier between the nail and the cation and cause it to lift away which will usually result in an infection that starts a pale yellow and develops to a dark green.
It is usually a mixture of a solvent and alcohol which will remove different types of oils. The nail plate has its own natural oils and this will remove them but only temporarily, it will also remove oils from makeup, hand creams and anything else that may be on the nail plate to ensure a clean and perfect surface for the coating to adhere to
Some brands require that the nail plate is buffed. This should only be for removing the shine on the nail and not to scratch the nail. Older formulations relied on these scratches to hold onto the base coat as a physical bond. Modern formulations do not require this scratching as it will eventually damage the nail plate.
Step-by-Step Guide to Gel Manicure Application
Selecting High-Quality Gel Products and Equipment
Many brands have a very specific base coat that is the one that is formulated to adhere to the natural nail. It is usually of a thin consistency and needs to be almost rubbed into the nail as no nail plate is entirely smooth. Its ingredients as such that the coating bonds with the keratin of the nail and creates a strong bond.
Some brands have the necessary ingredients for good bonding in their colour coat so this step is missed. But always refer to the manufacturers instructions.
Demonstrating the Correct Application of Gel Base Coat
There are different types of bases depending on the brand. Some are called a ‘rubber base’. These are designed for a nail that is a bit weak and bendy so they will move with the nail and not pull against it. Some builder gels are used as a base. This is usually thicker so they can provide some extra strength for a weaker nail They can also be used to reshape a flat nail, for example, to give a more aesthetically pleasing shape.
However, they should not be used for every nail as some do not need them.
All base coats need curing under the UV lamp for the time stated by the manufacturer.
Optimizing Curing Time for Each Layer of Gel Polish
If a rubber or builder base is used, after curing, there may need to be some shape refinement. This will ensure that the shape is smooth and thin at the base and free edge with a thicker area in the centre of the nail to provide some extra strength.
Before any such shaping the sticky layer must be removed. This is the surface of the coating that is not cured due to the oxygen in the air. An alcohol is used for this and most brands have their own product
Whatever thickness of the builder is needed for the specific nail, it is important to apply it in thin layers. A thick layer can cause burning on the nail bed which is both painful and daggers. It is due to the extreme activity in the polymerisation (curing) process. It is better to apply even 3 thin layers than 1 thick layer as a thick layer will not cure properly and could cause allergy problems due to the uncured product left on the nail.
Key Application Tips for Achieving a Long-Lasting Gel Manicure
After the appropriate base is applied, cured and shaped, it is time for the colour to be applied. Again this must be applied thinly. Even if it takes several coats for a good colour it must be done.
It must be cured in the brands lamp. This should have been tested fr each colour in the range as darker or more opaque colours take longer to cure but the brads testing should have addressed this in the formulation and mechanics of the lamp so just follow instructions.
The edge of the nail must also be sealed, as it takes a lot of knocking, especially when typing. This will help prevent chipping and lifting.
Make sure the sides and base of the colour cots are perfect even and straight and not touching the skin. If any does touch the skin, have an orange stick ready to wipe it away. Do not use your finger or nail unless you are wearing gloves.
If the colour looks wrinkled when out of the lamp it means that you have applied it too thickly and it is not cured. Remove it and start again.
Creating Nail Art and Design Techniques
Nail art is very popular and every nail tech has their own specialities.
It can be applied on colour coats or after the top cat depending on the technique. But clients must make sure to book for art as it can add considerable time to the appointment.
Lastly is the top coat. As with traditional nail polish, a top coat is there for protection and extra shine. It is a different formulation from bases and colour cats and is usually tougher and shinier. It is also used to seal in any art that has been applied. As usual, it needs curing in the UV lamp at the setting and time prescribed by the manufacturer.
After curing, the gel will develop a sticky layer that must be removed using alcohol, taking care not to get any on the skin, as some gel products are known allergens.
Removing Gel Manicures Safely
An opaque UV gel manicure should be removed every 2-3 weeks to check on the health of the nail plate. The only exception to this is if there is a clear coat on the base. Then the colour can be removed (buffing or e-file) to see the nil plate and the new growth prepared as usual and a new colour coat applied.
Apart from this the nails are continually growing and most wearers do not like the bare area of regrowth.
Many pros are pleased to show pictures of their clients nails at 5-6 week of growth with no lifting. This is NOT something to be proud of!! No lifting is just the nail pro doing their job properly but also demonstrates that they have not educated their clients on what is best for the health of their nails!
Some people have lost all their nails to an allergic reaction that wasn’t spotted intimately. This takes many months to grow out and has an impact on other areas of health for a lifetime! It isn’t worth it.
The Importance of Professional Gel Removal Services
Removing a UV gel polish at home is not recommended due to the time and care it requires, typically ranging from 1-3 minutes, depending on the brand. The proper removal process involves soaking the nails in the correct remover, and some top coats may need to be gently buffed beforehand. Attempting to pick off the coating can be most damaging, as it may peel away layers of the nail and considerably weaken them. For safe and efficient removal, it is best to seek the assistance of a professional who knows how to handle the process.
Gentle and Non-Damaging Gel Removal
Removal should be quick and efficient. Some brands require that their top coat must be buffed first as it does not remove in a solvent. This should be done quickly and safely, i.e. Not buffing through all the layers and not catching the skin.
Then nails can be wrapped in foil with a little piece of cotton wool (the size of the nail plate) soaked in remover, or they can soak in a bowl of solvent covered with a towel to preven evaporation. Or using an electric soaking machine which speeds up the process.
Placing hands on a hot pad of the soaking bowl in a bigger bowl of warm water can speed up the process.
Gel Manicure Maintenance and Aftercare
- When you leave the salon with your pristine nails, you must commit yourself to some simple home care.
- Your nails may feel stronger but they are not really so don’t use your nails as tools as you will just break them.
- Use a good quality nail oil several times a day. This will not only help the skin around your nails but also help the coating to remain flexible.
- DO NOT remove or pick the coating off!!
- If your nail feels odd or you can see any discolouration then contact your nail pro immediately.
- Make sure you have rebooked for 2-3 weeks later.
Common Issues and Solutions
If you notice any lifting of the coating then make an appointment asap. Lifting means that water can seep under it and cause an infection.
Lifting means that the preparation of the nail has not been thorough enough. Maybe some cuticle is left on the nail, the coating has touched the skin or the nail condition is not suitable for a UV gel polish manicure. Not all nails are suitable for a UV gel polish. They may be too thin or even too thick and brittle.
Clients may arrive with damaged nails from previous UV gel polish manicures. The most important is if there are signs of an allergic reaction. If this is suspected then the only option is to remove all product and suggest the client see a GP in the hope they refer to a dermatologist for acrylate testing. This will determine exactly which ingredient/s are causing the reaction. Until this is done it is impossible to know which product can be used again.
Any nail damage must be grown out without any product. The best way is to keep the nails very short and a good nail oil used several times a day. When the nails are healthy, the testing will tell what needs to be avoided. If this is not available, a product that is HEMA free can be tested on one nail and removed in a couple of days to see if there is any adverse reaction. If all is clear, a full manicure can be applied with a strict 2-week appointment to remove to see the nail plate.
Gel Manicure Trends and Innovations
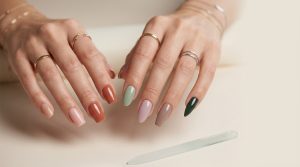
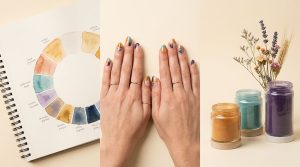
There are many possibilities for nail art when using a UV gel polish. The most popular at the moment is the use of pearlescent pigments over a neutral colour coat.
But glitters, foils and stamping designs can be used with a vast variety of combinations, which are all quick and inexpensive.
Many brands are launching HEMA free products. As HEMA is the most known allergen, it is a good idea to use these. HEMA is used for good adhesion so moving to HEMA free, a far more rigid protocol with nail preparation is needed as the adhesion will be more reliant on a perfectly clean nail plate.
More nail builders are being launched, but it is essential to use them only when needed. Applying builders to nails that do not require them can cause more problems.
The coating should be able to break before the nail does. An overly strong overlay can result in the loss of a nail plate as the coating doesn’t break, but the nail can get pulled off the nail bed!